Monday, 5 November 2012

Amended Criteria and Outcomes

Having completed all the various components of my presentation including:
  • presentation panel
  • powerpoint presentation, and a
  • blog compendium 
I found it necessary to assess these components against the assessment criteria, and produce an amended version so that it would make it easier for the Tutor and those who mark our assessment to see when and where I fulfill certain points, and where to look for certain outcomes as they could either be covered in my Panel, Powerpoint, Blog Book or even in my oral presentation (of which I have included in the components to hand to the Tutor prior to the commencement of my presentation). This amended version can be seen below, and the text in blue highlights areas that have had minor adjustments due to the various issues, challenges and testing I faced and undertook during the compilation of my final outcomes.


Tuesday, 30 October 2012

Learning Revit as I Go

Start Point: Site Plan (modelled in conjunction with my friend Sian)
As I honestly had no idea where to begin with modelling the site.

Day 1: Adding Floor Plates, columns, shafts and stairs
(didn't know how to put in elevators or how to do ramps)

Day 2 + 3: Adding more shafts and walls
(still couldn't figure out ramps)

Day 4: Using walls and floors to create elevator shafts
(as suggested by peers), and creating skylights
(ramps still a mystery)

Day 6: Adding windows and parking spaces
(ramps still a mystery)

Day 7: Finally figured out ramps!!
Adding more walls, materials and construction lines

Day 8: Adding roofs, making components for seating,
editing floor plates and adding landscaped ramp from level 2 to level 3

Day 9 + 10: Adding columns to roof entry points and railings

Day 11 + 12: Adding trees and entourage

Day 13 - 15: Moving entourage around for use in particular views and renderings
Started in Week 11, I allocated myself 2 weeks to get my Revit model finished in order to start rendering views in Week 13. It was lucky that I did start so early as learning the program as I went took far longer to do certain things than I had anticipated. However, as you can seen from the above images, it was around Day 7 (when I finally figured out how to do ramps, as this was causing me much stress and I freaked out because I thought I wasn't going to be able to do certain design elements that I wanted to) that I finally picked up the pace and really started to get things done.

At first, getting up each morning to jump on the computer and model felt like a chore, but as the days went by and I got better and better I started to really enjoy what I was doing as I could see what I was creating. It was hard to put aside that fact that it would be easier for me to do some elements by hand, however I just had to keep looking at the big picture and the final desired outcome to realise that I wouldn't be able to hand draw the entire entity to a level that would reflect my project intention and my own aspirations for my project.

The next hurdle after designing the model was to start rendering, and as I had to turn-off certain aspects of my graphics card to run the program on my computer in the first place the first 2 renders took 3 hours each to do and had to run my computer over night and hope that when I woke up in the morning that they didn't crash my computer (which they did occasionally). The 3rd render I tried 3 times as it kept crashing my computer, so I resigned myself to the fact that I would have to go into uni to try rendering there. The stress levels started to rise yet again, but I got into uni early one day, used 2 computers and got them done. I don't know why people complain that rendering at uni takes so long...20mins per render is nothing compared to 3 hours minimum only to find its crashed your computer!!

All in all, using Revit has been a very worthwhile experience as I now feel I have the skill to use the program effeciently and can now add this to my resume. I do find it sad though that I had to go to TAFE to get an introductory course for Revit as we aren't taught the program or even ArchiCAD for that matter at our university. Knowing a program/s is one of the main aspects that people will hire you on, and yet it wasn't included in my course curriculum?? Weird!!

Photo Montages

One of the first activities I undertook for Project Two was a couple of site visits. Having never been to Paddington before, these were most beneficial as I had formed a completely wrong idea about the area. By photographing the surrounding streetscapes and context, the unique identity of Paddington showed itself to me. It is this unique context that my architectural entity treats with respect and sensitvity by incorporating some of the design elements inherent to the Queenslander typology, as well maintaining some key aspects of Paddington Central ie. the iconic entry roofs to the centre. Also, the atrium spaces (being the most effective in the centre) have been maintained and more have been added in my design outcome in order to capitalise on these effective gathering spaces.


Appropriatenesss of What You Communicate


The above image is from Yasu's lecture in week 12 regarding his interpretation of criteria and the appropriateness of what we present. He showed this image by Daniel Libeskind as an example of the effectiveness of communicating an idea despite the possibility that one may not have any idea of what they are looking at. One may not fully understand every aspect of what they are seeing, but the core idea or message of the image comes across regardless.

The image below is my own example of this kind of communication, taken from my Revit model of my architectural entity. Initially one may be confused as to what they are seeing, however upon closer inspection, one can see that there are various layers present that are connected via stairs. As well as multiple spaces, trees and a relationship to the surrounding roads and typography. I think this is an effective mode of communicating ones core ideas and key design elements.

Important Apsects Diagram

The above diagram was my initial approach to addressing the criteria point regarding showing important aspects of the design through captured scenes, a storyboard or a movie. It was my intention to use a panorama vignette of various spaces throughout the centre to show how specific users would use the spaces and interact with each other in the year 2025 and 2030.

I was finding this incredibly hard to actually do once I had designed my entity, and thus modified this represenation accordingly to better suit my intention and convey importan aspects of my design. This new version can be seen below and is included in my final panel outcome.

The key on the left shows the various User Groups of the centre, as well as the 3 types of Facilitators present to encourage interaction and the exchange of experiences and knowledge between Users. The diagram is broken into Location (space within the centre), View (snapshot of what that space looks like), Activity (mode of interaction or exchange that takes place) and the Users and Facilitator combinations required for that Activity.

By showing the whole age spectrum of Users, I found it was unnecessary to reference two points in Time to show how the centre is integral to Users at all stages of their Life. I was finding it difficult to convey the exact activity in renderings or hand-drawings, so using stock images gave the diagram a real-life aspect that people can relate to. I think they are quite powerful when combined with the other elements of this diagram in conveying my intention.

Wednesday, 24 October 2012

Week 12 Tutorial: Reflection

Once again I had to give a brief 3 word summary of my project to my Tutor, comprising of: Community, Belonging and Interaction. This has been a great exercise in re-affirming to myself the purpose of my architectural intervention.

The Tutor also liked the various aspects I was able to talk about including:
  • storytelling, gathering and the 'passing of knowledge' from person to person, elder to youngster - a new take on the modern role of the library
  • greenspace ideas of an outdoor cinema (to activate at night), cafes and refreshment opportunities for those who ride to the centre, and providing Paddington with a much needed park/suburban 'Southbank'
  • markets - combination of indoor and outdoor, and also guidnace and advice market days
The Tutor was also very positive about the use and need for Facilitators and once again ensured that I stick to 3 key ideas in my presentation.

Week 12 Lecture: Reflection

I found the the Week 12 lecture to be highly beneficial in reminding me once again that we are to design 'Archietectural Fiction'. I had kind of lost sight of this throughout the past few weeks, however having my project founded in the Future Scenario proposed in Project One, it was merely the reminder I needed to ensure I make my 'Architectural Fiction' evident.

I was deciding how much detail to go into with the Plot of my scenario, and this lecture answered this for me. I was of a mind to go into detail and explain the research points that support the Plot's believeability - however I thought this may not have been well received in the Crit. However, after this lecture, I am going to go with my orginal instinct.

By going through his own interpretation of the criteria, it was made fairly clear that I am on the same page as the lecturer. Some of his representation suggestions have been included into my second panel template draft for inclusion into my final panel outcome. These include:

Purpose:
 'communicate what you've acheived' (eg. via exploded floor plans or 3D)
'show how an important element is maintained or changed' (eg. shipping containers)
'good sections that show how spaces are used, highlighting main characters' (eg. mixture of lineweight and render sketches)

Navigation:
'need to understand how character/s move throughout building'

Integrity:
'a key detail of how key area is put together' (eg. program of Facilitators and their role)

Presence and Identity:
'how it sits in context, and how it is recognised' (eg. include Users in hero shots)

First-Person:
'views from a User's perspective' (eg. in Important Aspects vignettes)

The lecturer also outlined 7 key points to cover in our presentation:
  1. Reality
  2. Creativity
  3. Purpose
  4. Navigation
  5. Integrity
  6. Presence and Identity
  7. First-Person Experience
These have been an excellent framework for determining a heirarchy of information for use in my panel layout.


Key Spaces

I found it necessary to think carefully about the Key Spaces of my design in order to prioritise these to make it easier when it comes to rendering (as this takes so long...especially on my computer). I believe the following spaces are integral to both my design as a whole, but also to highlight the fundamental principles at Paddington Exchange's core:

  • Greenspace (in 'market mode' or 'outdoor cinema mode')
  • Library (in various learning modes and storytelling mode)
  • Rooms (a lounge room, a reading room and meeting room)
  • Event Spaces (at both daytime and night-time)
  • Community Garden (group gardening mode)
  • In-Between Spaces (showing interaction, exchanges and gatherings)
I also think it will be highly beneficial when it comes to showing how my specific Users utilise these spaces, to include at least one User (from each age-group) and one Facilitator in each of the renders showing these key spaces.

Thursday, 18 October 2012

AR Magazine Reading: Reflection

Issue 127: The Residential Issue
Article: Re-Make/ Re-Model: Turning Dead Office Space into Living Housing

Article Overview: "In the UK, housing shortages often sit side by side with the problem of obsolete office buildings. For FAT Architecture and Adaptable Futures, the solution is to repurpose tall buildings, reconnecting with a modernist ideal: discovering new forms of living through architecture."

Introduction: Although this article is more concerned with the repurposing of office buildings for residential purposes in the UK, some of the fundamental principles and ideas put forth can be adapted and applied to any retro-fitting and re-using practice conducted in Australia and in particular South East Queensland. These ideas are of particular pertinence to my project and have therefore been outlined below:

"Retrofitting and adapting buildings for different uses requires a commitment to loose-fit design and simpler structures. Historically, architects have struggled with these concepts, preferring to focus on formalised ideas of mechanical flexibility - Archigram's Plug-In City, for example - rather than less ostentatious structures capable of subtle change over time."

"The ability to adapt and adjust over time to suit changing desires is hugely important."

"While the environmental benefits of adapting buildings are difficult to quantify, extending the useful life of buildings allows for less new material (which helps meet CO2 reduction targets), minimalisation of waste (through the retention of embodied energy) and potential containment of urban sprawl."

"Adaption allows for environmental stability with the continued use of local landmarks while allowing for new uses, users and identities. What's more, the growing transient context in which buildings are enmeshed will continue to raise questions for designers about buildings as stable images of specific functions."

"The obsolescence of all building types as a result of technological and social shifts presents massive challenges in a world of finite resources. Clearly, it is senseless to simply tear down buildings after a mere 30 to 40 years of life. The alternative is to learn how to design buildings that are more adaptable to change and, as our research suggests, to learn how to adapt and develop the ones we have already."

Reference: Holland, C. (2012). Re-Make/Re-Model: Turning Dead Office Space into Living Housing. Architectural Review Asia Pacific: Issue 127 - The Residential Issue (October/November 2012).

Summary of Case Studies

Case Studies: Contribution to Design Outcome
Case Study #1: Re-Start Pedestrian Mall

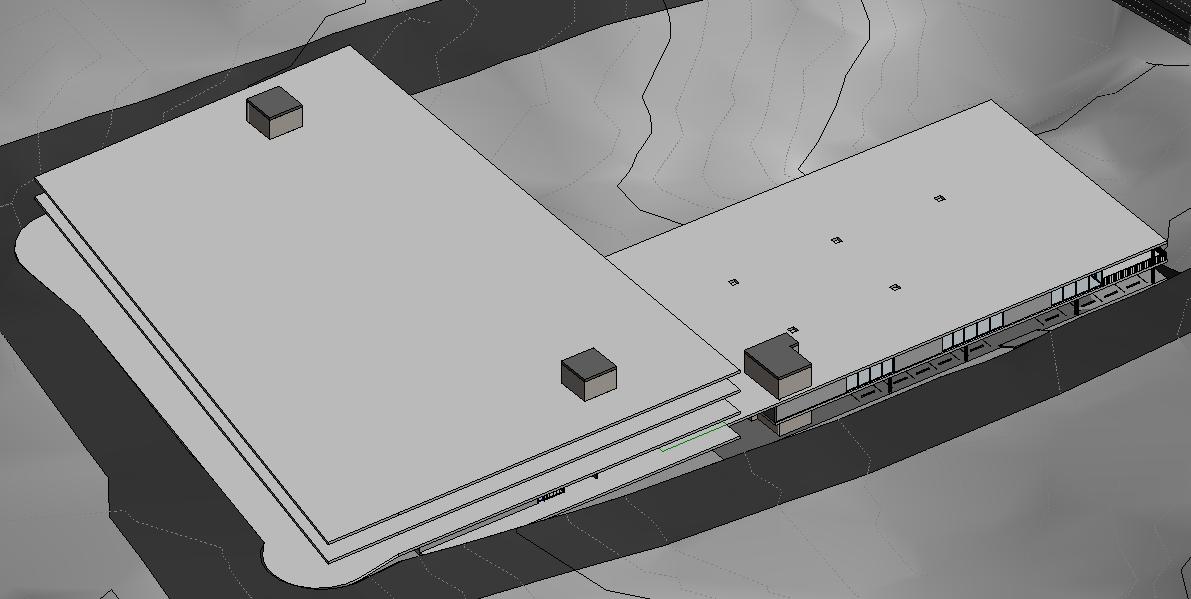
Paddington Exchange’s pedestrian orientation as inspired by Christchurch’s Re-Start Mall has been achieved through the use of various atrium spaces, complete site accessibility (for disabled person also) and connected exterior spaces. The use of shipping containers for modular design aspects, and the materiality these bring to Paddington Exchange have also been borrowed from this Case Study and provide the centre with a rich and tactile material palette when combined with the timber weatherboards (from Case Study #4) and existing concrete and glass.
Case Study #2: M.C Escher

Multiple vertical and horizontal access points throughout the centre have been a direct influence of M.C Escher’s work. Through various forms of circulation methods including: lifts, stairs, escalators, ramps and landscaped ramps, interaction ‘hot-spots’ can be generated across the whole centre and can result in incidental experiences and exchanges between users and facilitators.
Case Study #3: Metastadt

The modular design benefits as highlighted  in the Metastadt example in Germany have been achieved through both the use of retro-fitted shipping containers and specially designed Amenities Pods. These modular design elements allow for the easy removal, maintenance and modification of various aspects that require regular up-keep throughout the life-span of the whole centre. This flexibility allows for the adaptation and evolution of the centre in cohesion with its surrounding context and users.
Case Study #4: Queenslander Typology

Being set in amongst a rich Queenslander context, Paddington Exchange responds to this with sensitivity and respect through the use of similar materials (i.e. timber weatherboards and corrugated iron), spacious exterior ‘verandah’ spaces, and climate sensitive design (using passive design elements, taking advantage of cross-ventilation opportunities, adequate shading and using landscaping for control of water storage and drainage).

All in all, I have found the exercise of completing these Case Studies to be highly beneficial to my final design outcome as one can see by the implementation of certain elements from all the case studies into my architectural entity, and for the expansion of my own personal knowledge and design repertoire.